Using 3-D Printing Technology to Custom-Produce Space-Efficient Counter Storage Solutions for the Advanced Squad Leader Game System
House the entire ASL counter mix—for every nation—using just three assorter boxes within a single Raaco RAA136242 unit? Yes, it’s possible. Here’s how.
The Advanced Squad Leader (ASL) tactical-level World War II game system provides an extreme boardgaming experience in a variety of ways—including game complexity, game length, and modularization. In addition, ASL presents players with the somewhat daunting logistical challenge of organizing and storing the ~15,000 1/2” and 5/8” cardboard counters that are used to depict personnel, fighting vehicles, terrain features, unit status, smoke, victory objectives, and other information relevant to gameplay. Indeed, players’ prefered methods of counter storage comprise a frequent subject of discussion at ASL tournaments—with matchboxes, bead organizers, plastic fishing-lure boxes, paper envelopes, and plastic bags all ususally making an appearance. But the most common storage device is the Raaco RAA136242 Portable Handy Box, whose four 45 mm internal-height “assorters” (drawers with top-down plastic swing lids) are each typically fitted out with two 22.5 mm-height layers of counter trays; each laid out in a four-by-two grid within the ~314 mm x ~218 mm assorters. Trays typically feature five-to-eight compartments, as depicted below. (Some measurements are approximate, because the assorters taper slightly from top to bottom, and so tend to be several mm wider at top than bottom.)
This is a system that I had used for years. But it has its disadvantages. As the image above shows, there’s a lot of wasted space, since each of the compartments within each of the trays (which are sometimes also called “inserts”) can hold 30+ counters, but ususally are used to hold much fewer than that, since one typically doesn’t need to carry around, say, 30+ Russian MMG counters, or 30+ British 6-4-8 squads. Of course, it is possible to create efficiencies by combining different counter types in the same compartment (say, by combining all Russian MG, or all British 8-moral sqauds). But then one ends up rooting around for the coutner one needs, including during gameplay, when time might be scarce.
So one is forced to make compromises. It’s possibe to segregate every counter type in its own compartment, but at the expense of spreading the entire counter collection over three, four, or even five Raaco boxes (which are not cheap); or stuffing a bunch of different counter types together so they may fit into two or three Raacos, and reisgning oneself to the attendant delays in locating counters.
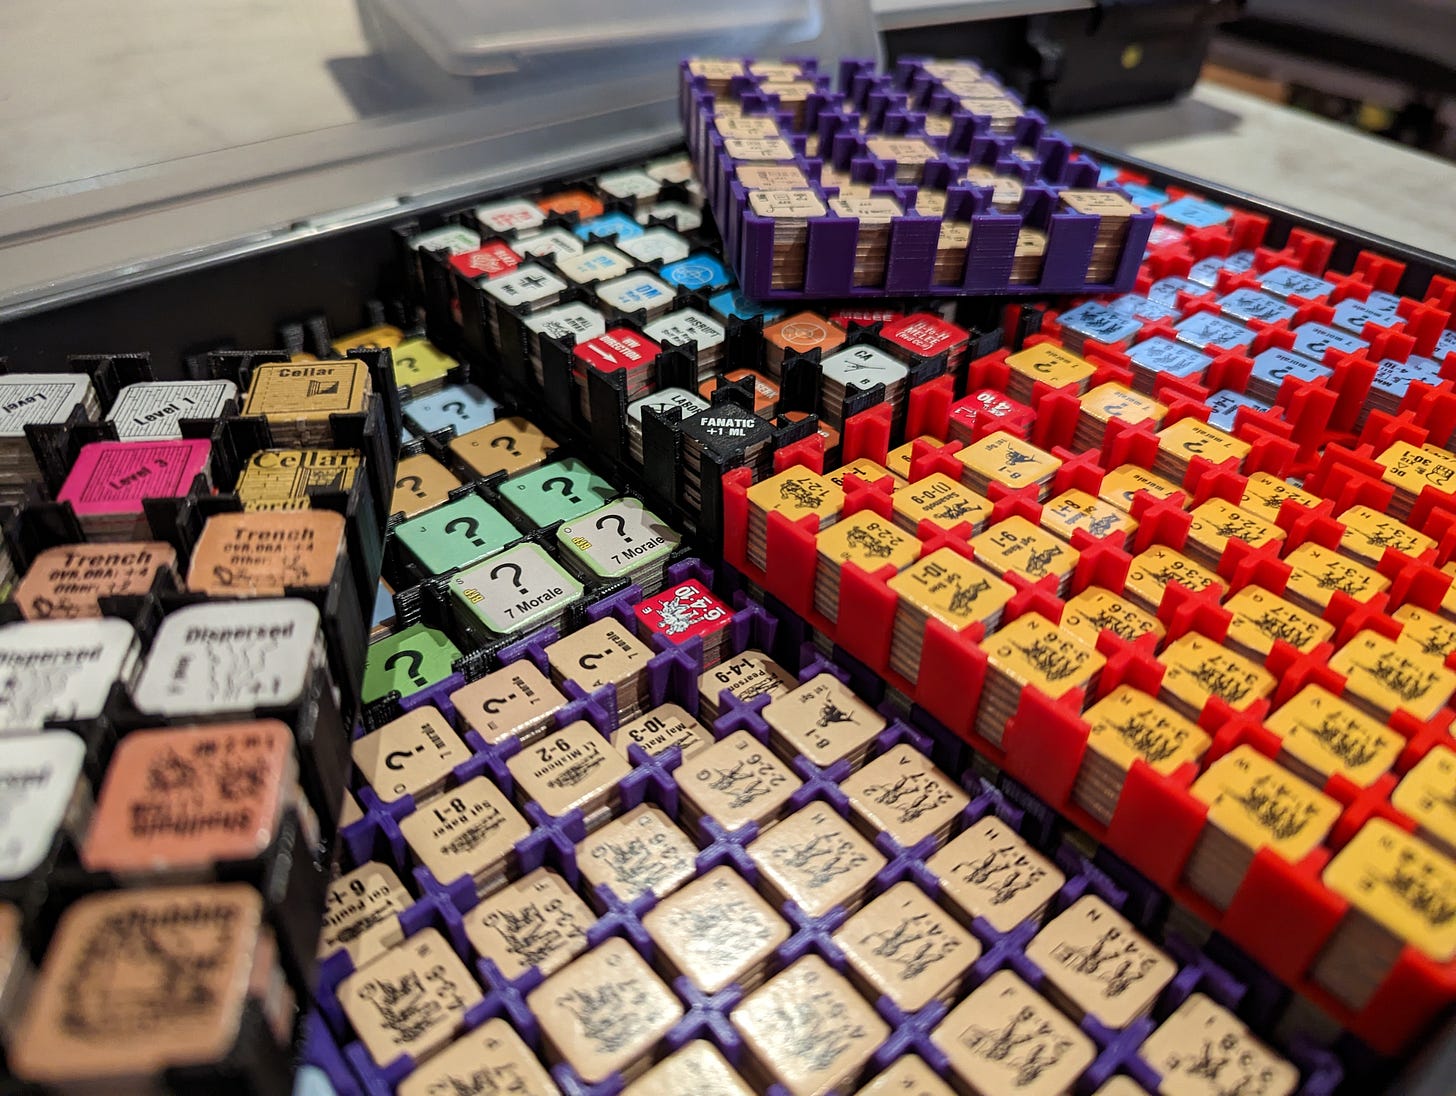
A few years ago, players started to adress this problem by applying (then-novel) consumer-use 3-D priting technology. I was an early adopter of this method, though I had to buy these custom inserts from others, since I didn’t have my own 3D printer. Typically, this meant duplicating the dimensions of the original Raaco inserts, but separating each into 35 compartments (7x5) for 1/2” counters, and 24 compartments (6x4) for 5/8” counters. Each compartment becomes a stacked column with a capacity of at least 13 counters.
By this method, space is saved in two ways: (a) Since compartments are smaller, even scarce counter types can be segregated in their own compartments, with less wasted space, and (b) The restrictive counter-specific dimensions mean that counters are stacked as a tightly packed column, with none of the wasted space that inevitably results from the juxtaposition of irregularly oriented counters.
Using this method, I have found, it is just barely possible to get one’s entire counter set into a single Raaco box—though with two caveats.
First, sensible decisions have to be made about how many counters one needs of any given type. I think my full game set contains something like five or six 9-2 British leaders. I’m reasonably sure that I can play this game for the rest of my life without ever needing more than, say, three (or, more likely, two—or even one). The same logic applies to many other counter types. Yes, I might need 40 Russian first line squads to play some monster eastern-front scenario. No, I will probably never need 40 Italian first line squads. Thirty will do nicely. Or twenty.
Second—and this is the issue that (spoiler alert) led me to buy my own 3D printer and start from scratch—you had to combine several different types of vehicles into the same stack. This is because, with rare exceptions (e.g. Russian T-34s), there are far fewer than 13 copies of each vehicle counter in a typical ASL set. For many vehicles, there are only three or so, which means segregating vehicles rigorously by type would result in about 75% of the space being wasted.
The obvious solution was to put similar vehicles in the same compartments—e.g. one compartment for Pz IIIs with 37 mm guns, one for 50 mm, one for 50 mm long-barelled, and so on. Unfortunately, this can create confusion when you’re looking for an obscure piece of hardware like, say, a PzA III/IV, not to mention some of the captured-use vehicles and the add-on counters that come with BFP game modules (e.g. the Sturmmörserwagen 606/4 mit 38 cm RW 61—that bizarre late-war assault gun with the modified 380 mm torpedo tube. The Germans made fewer than two dozen of these things during the war. There’s no way I’m going to devote a whole 13-counter counter column to them. And it’s far from clear what other vehicles this thing would be grouped within a compound arrangement.)
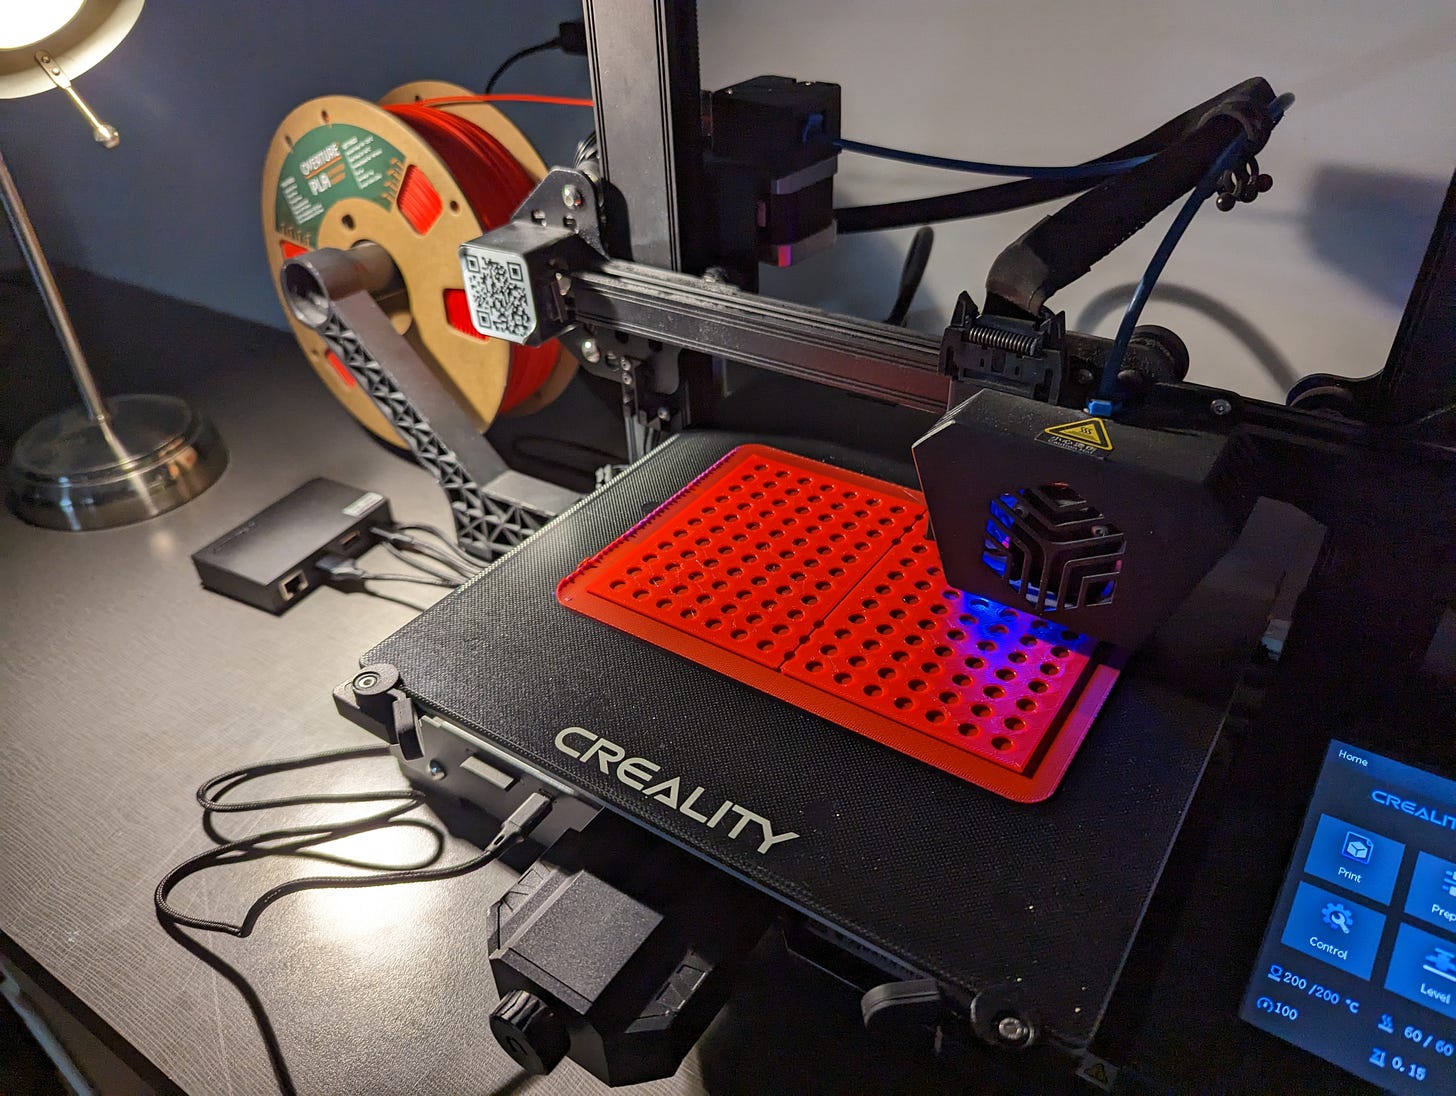
To get around these issues, I bought a low-end 3D printer—a Creality CR-6 SE, which I was able to buy on Kijiji for just CAN$240 (something I mention for the benefit of those looking to get their own home counter-holder mill going). The plastic filament costs about CAN$30 per roll, and it would likely take about two rolls of the stuff to make enough trays for an entire counter set—i.e., about a $300 investment.
My first order of business was to abandon the 22.5 mm height convention for the trays, since it locked me into a 13-counter-per-compartment minimum for (near) perfect space use. That’s simply too deep, for the reasons described above.
Moreover, I also abandoned the assumption that every insert needs to be the same height. Instead, I decided that inserts for all 1/2” counters as well as for informational/terrain 5/8” counters would be 15 mm high (i.e. stacking three to a box, instead of the two that stack with the 22.5 mm variety). These stack about 8 to 9 counters (depending on how new or old they are—as older counters that have been kept in humid environments, or which are unclipped, tend to take up more space).
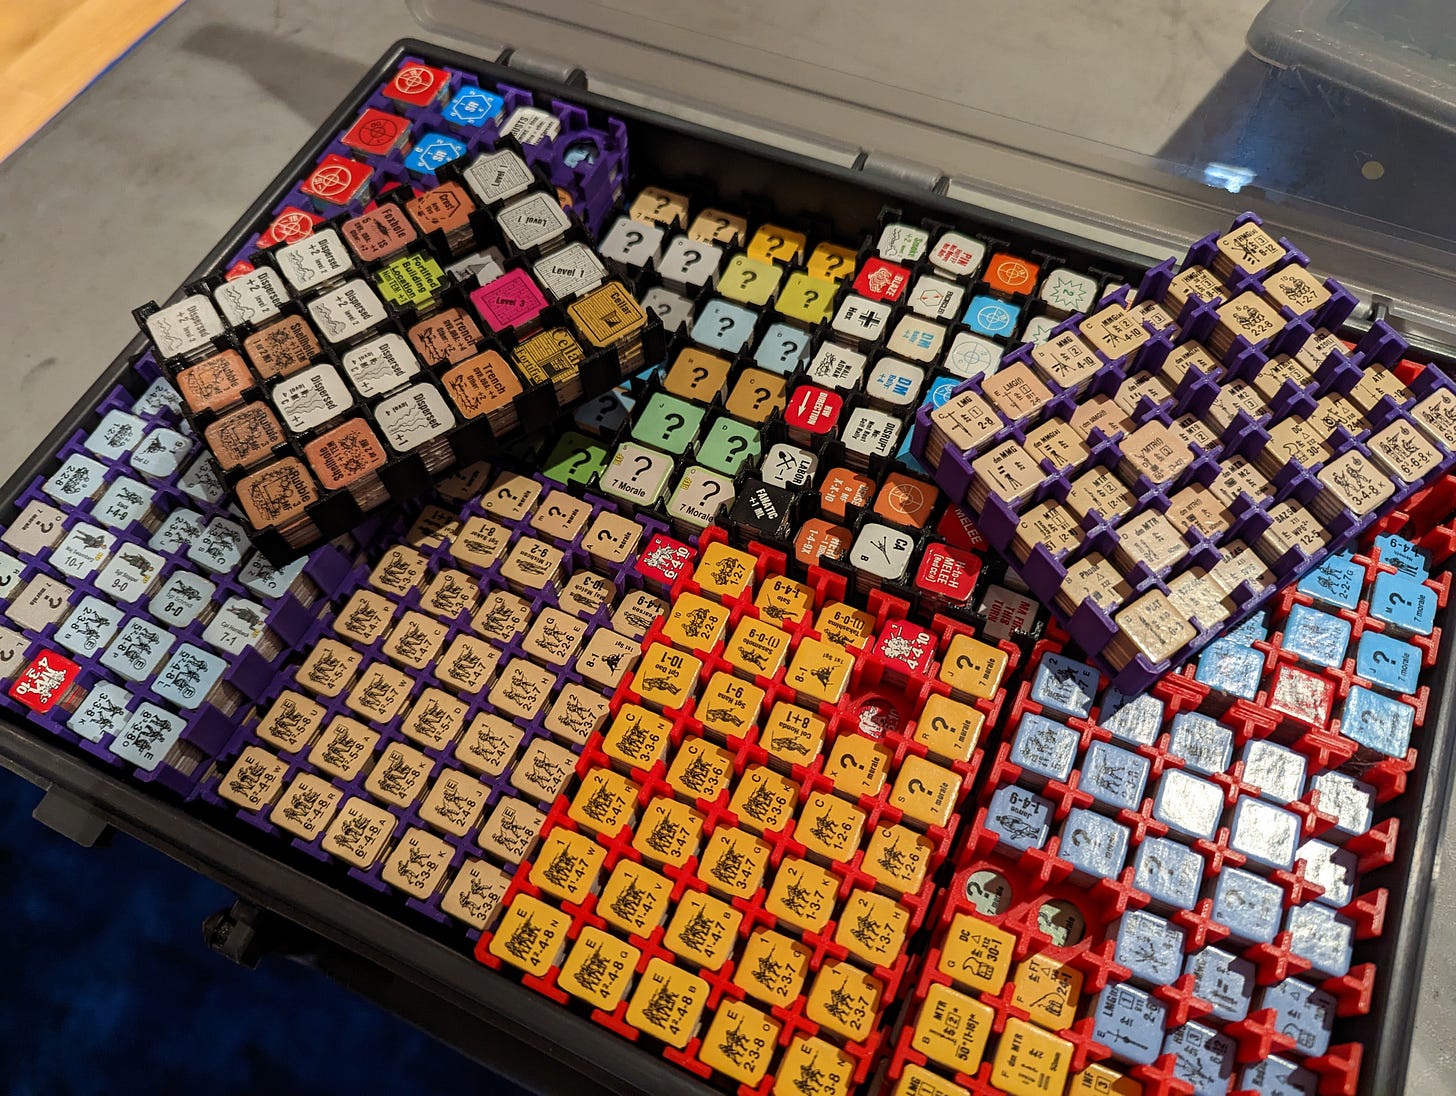
On the other hand, vehicle-counter trays would be stacked six to a box—i.e. 7.5 mm in height, which allows each compartment to stack four counters. (In practice, I tend to set the vertical design parameters at 14.9 mm and 7.4 mm, instead of 15 mm and 7.5 mm, respectively, to allow paper buffers between the layers.) These dimensions allow me to mix and match with my 1/2” and 5/8” counters in the same box, since two layers of the vehicle trays make up the same height as one 1/2” counter tray. For design, I used the free TinkerCAD program.
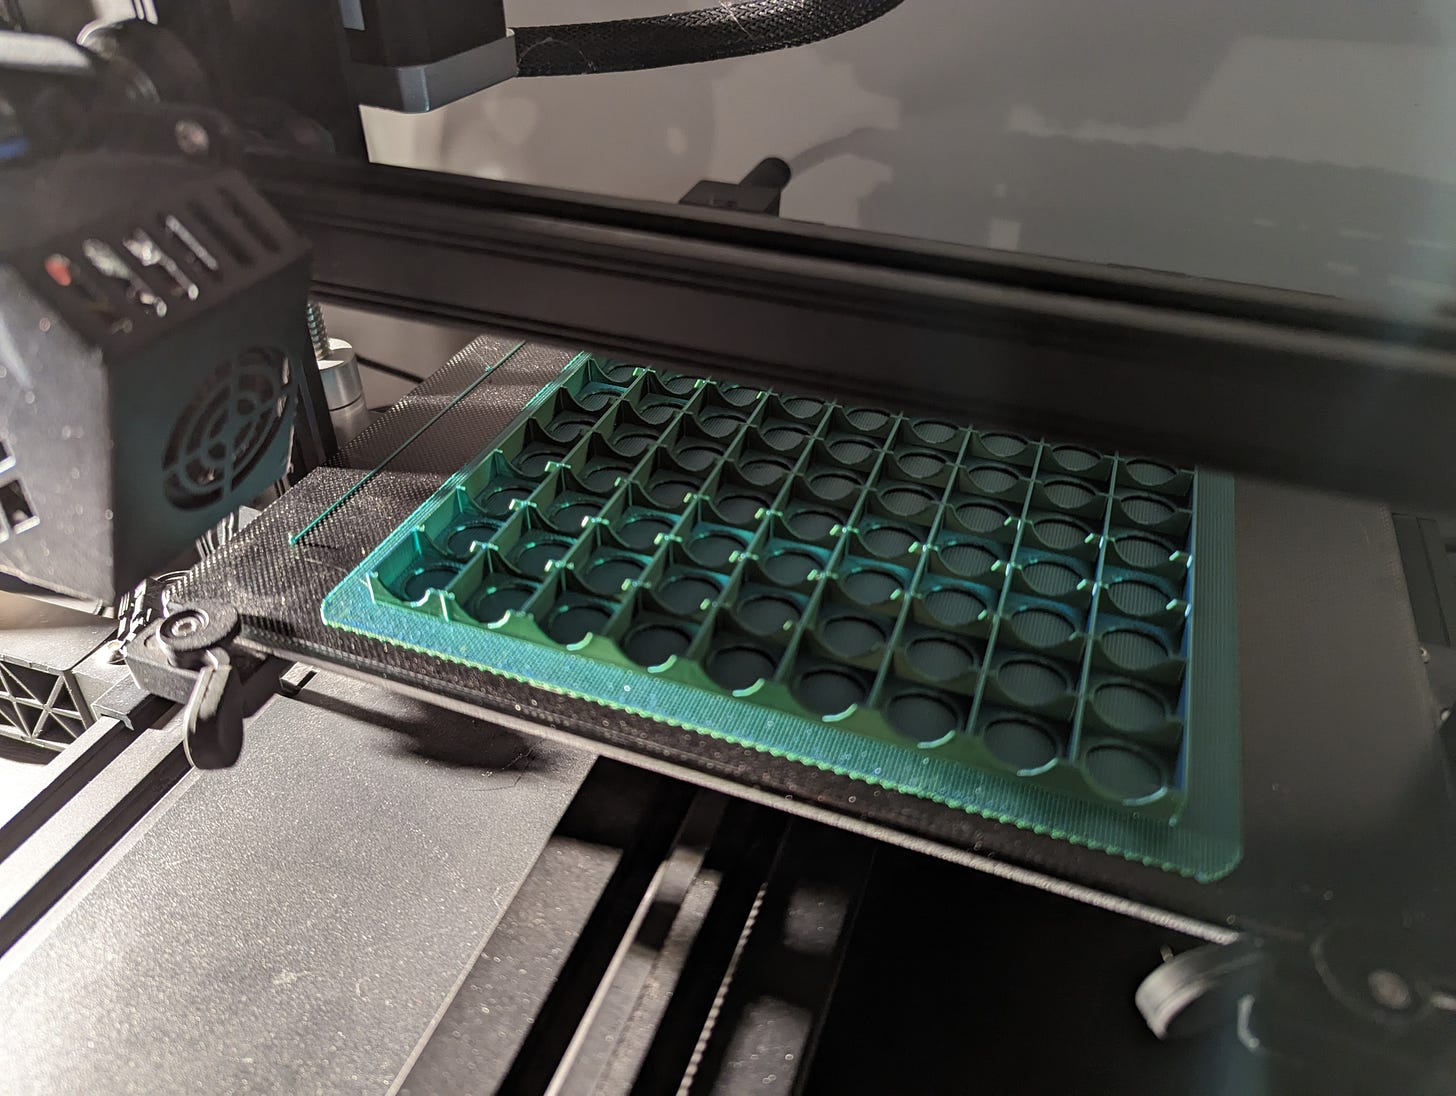
The images below show what the trays look like at the design stage for 7x5 and 6x4 cells, with 15 mm height. As may be seen in the second image (corresponding to 6x4 trays), the print-size capabilities of the Creality CR-6 SE permit for the printing of up to four inserts simultaneously.
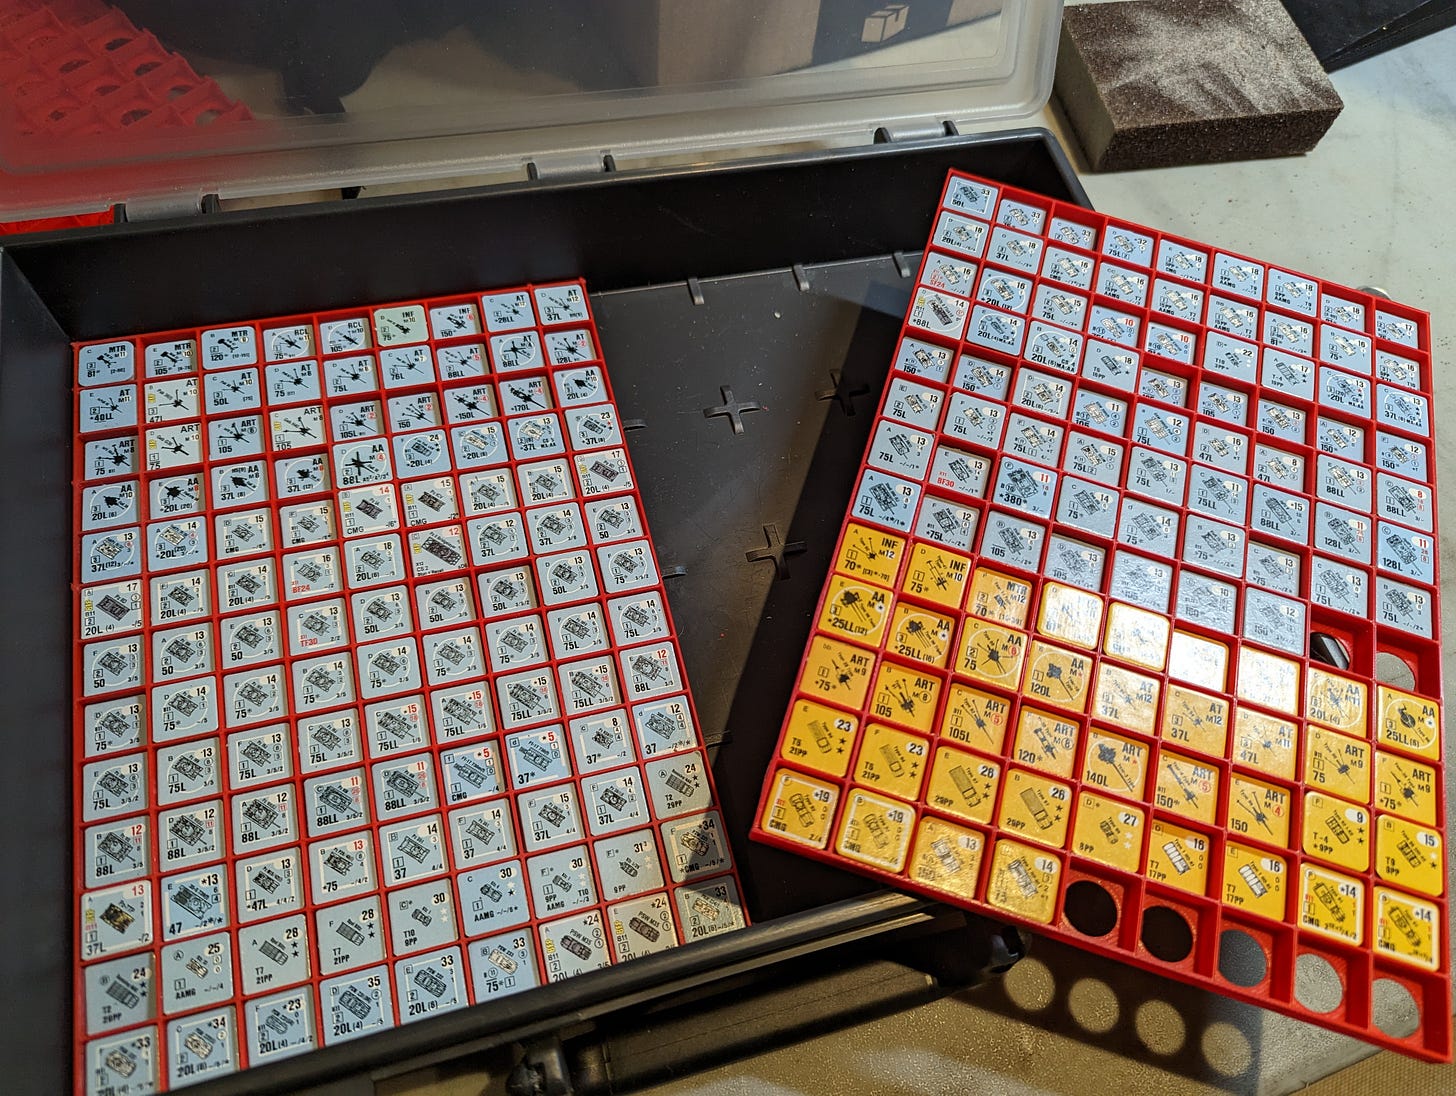
For vehicles, on the other hand, I decided to go for a much bigger footprint—156 mm x 218 mm, corresponding to a full half of each assorter. The reason I did this is that this allowed me to (just barely) squeeze in extra rows/columns of cells in both directions, assuming I kept the dividers very thin.
Note: If anyone wants a copy of the vehicles tray I created, you can download it here. For the 1/2” counters, I relied on designs created by Derek Ritter.
I.e., while the traditional 6x4 format, if extrapolated across the entire footprint of the assorter would yield 192 cells, my technique yields an 18x13 grid (234 cells). This capacity increase wouldn’t be possible if the inserts were smaller, since the space savings per insert would be fractional, and so not permit any extra cells. The photos below show what the inserts now look like (keeping in mind that they stack six inserts to a column and, to repeat, each cell can hold four counters).
These trays are delicate to work with, obviously, and you would not want to drop them. But despite their thin vertical dimension, they do not significantly droop when you hold them on one side—because the internal walls act to provide a high moment of inertia (similar to the function of the “web” in a standard I-beam).
It’s hard to give a precise count on how many counters you’ll be able to put in each assorter with my system, since even this technique does not completely do away with wasted space. In particular, not all of the vehicle cells will contain four counters. Many will contain three, or two, or even one. But if you a few back-of-the-envelope calculations, you’ll find that it’s possible to get 5,000 vehicle counters or more into the same assorter—with (crucially, because this is the point of the whole exercise) each individual vehicle type (and sub-variant) getting its own cell. You won’t find yourself digging through trays looking for this or that vehicle, because there won’t be a single game counter type that won’t be visible to the naked eye from a scan of the surface of your trays.
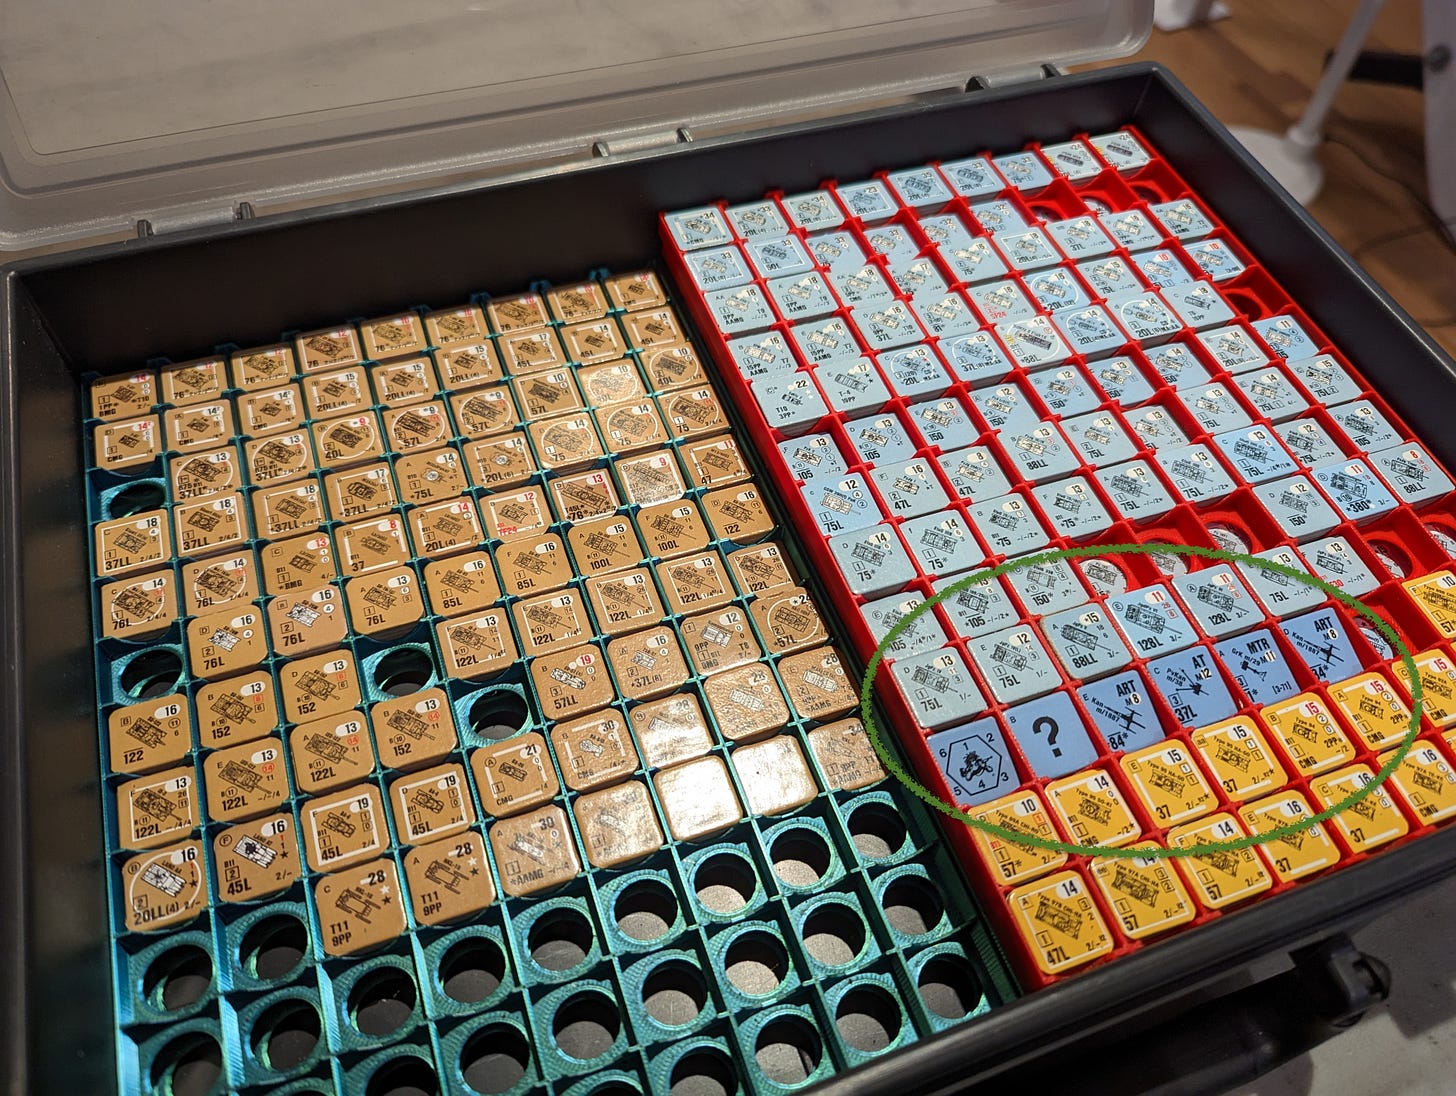
Counter density should be similar for the 1/2” trays (which aren’t as efficiently spaced, but which are, of course smaller.) So, assuming a total of about ~15K counters, it should be very easy to get your whole kit into a full four-assorter Raaco box. And while I haven’t yet sorted my whole kit using this new system, I think I have a reasonable shot at getting it down to just three assorters, thereby leaving the fourth one free for other game components.
One final note for those who adopt my system: The tolerances on the 9x13 vehicle trays are very tight, especially in the Y (13-cell) axis. Each cell is internally sized at about 16.4 mm (X) by 15.9 mm (Y), thereby almost no leeway on the Y axix. (A 5/8” counter should, in theory, have a 15.875 mm side length. In practice, I’ve found, they’re typically closer to 15.8 mm. EXC.: Swedes. See below). So this system probably won’t work if your counters aren’t clipped, or have been deformed by moisture or what not. Even with my relatively new counter set, there were a few counters I had to sand down slightly to get them to slide smoothly into the cells. So you’ll want to keep some sandpaper nearby when you’re doing this. (I would also use a wirebrush to finish off the printed counter trays, to get rid of stray filament strands.) And, needless to say, once you start using these trays, you will need to use a vacuum suction pen to easily move counters in and out.

The only counters that absolutely did not fit properly were the Swedes from the 2020 ASL Action Pack, Swedish Volunteers, which, for some reason, were produced at something like 16.25mm. As you can see in the photos above, I had to lay those at an angle.
For those who choose to adopt this storage system, I hope it works for you. I am happy to send you my STL files, and even modify them for those who would like slight changes to the dimensions.
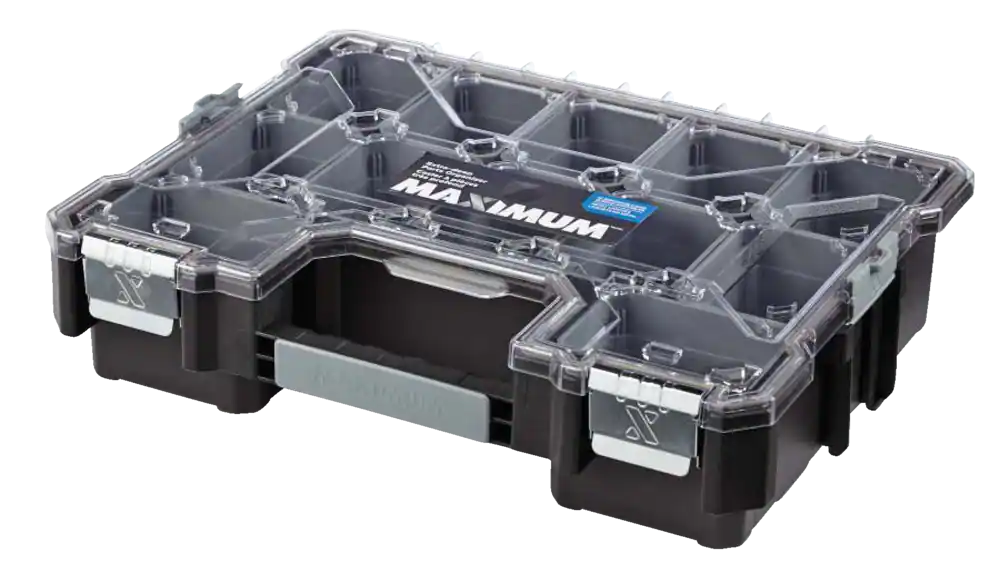
p.s. One thing I should add is that everything I have written here will likely be outdated or irrelevant in a little while—because the same custom-build 3D printing technology that allows us to make more efficient inserts for the Raaco RAA136242 will also allow us to make similar inserts for any storage unit; including much less expensive (and more widely available) products. E.g. the Mastercraft parts organizers they sell at hardware stores.
Indeed, perhaps designing inserts for these cheaper units will be my next project.
p.s. To repeat download information contained above: If anyone wants a copy of the vehicles tray I created, you can download it here. For the 1/2” counters, I relied on designs created by Derek Ritter. Questions or corrections: Contact me by using the contact form here.








Very interesting - have you designed any inserts for less expensive non Raaco cases?